The Massimo Warrior 1000 MXD Crew is great for Light recreational off-roading, compact utility tasks, and small-scale agricultural work.
The Massimo Warrior 1000 MXD Crew is poor For Heavy-duty applications requiring high towing or larger cargo capacities.
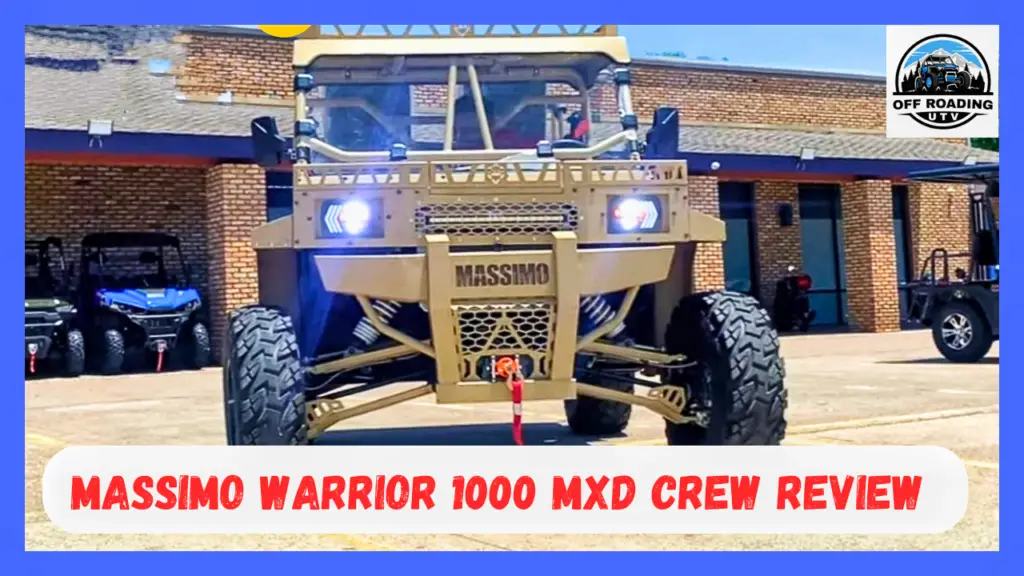
We all know Massimo is a very popular UTV brand. Recently, they launched a new powerful UTV in the Warrior series, which is The Massimo 1000 MXD crew.
The Price of the Massimo Warrior 1000 MXD Crew is $21,999.
The Massimo Warrior 1000 MXD Crew 2024 is a highly rugged and comfortable UTV designed for work and recreation.
Massimo Warrior 1000 MXD Crew is Powered by an 85 HP V-Twin SOHC liquid-cooled engine.
Massimo Warrior 1000 MXD Crew offers exceptional performance with 13.8 inches of ground clearance and 29-inch high-performance all-terrain tires for true off-road adventures.
The spacious interior includes ample legroom, a grab bar, and a large 12.6 cu. Ft. cargo bed, capable of towing up to 1,763 lbs.
Additional features like hood and roof racks and a 10-inch touchscreen display enhance utility and convenience. Its Full Metal Jacket build ensures long-term durability and reliability.
For more details and pricing you can visit the official Massimo website.
What are the length, width, and height of the Massimo Warrior 1000 MXD Crew?
The dimensions of the Massive Warrior 1000 MXD crew are:
- 83.5″ in width
- 154.5″ length
- 74″ height
What is the front and rear tire size for the Massimo Warrior 1000 MXD Crew model?
Massimo Warrior 1000 MXD crew UTV has 29-inch tires each on the front and rear.
What is the wheelbase of the Massimo Warrior 1000 MXD Crew?
The wheelbase for the Massimo Warrior 1000 MXD Crew is 117.7 inches.
What is the ground clearance of the Massimo Warrior 1000 MXD Crew?

Massimo Warrior 1000 MXD Crew has a ground clearance of 13.8 inches.
What is the towing capacity of MASSIMO WARRIOR 1000 MXD CREW UTV?
The towing capacity of the Massimo Warrior 1000 MXD UTV is 1,763 lbs.
How much fuel can the Massimo Warrior 1000 MXD Crew’s tank hold?
The Massimo Warrior 1000 MXD Crew’s fuel tank holds 7.95 gallons of fuel.
What is the seat height in this vehicle?
The seat height of the Massimo Warrior 1000 MXD Crew is 34.5 inches.
What is the dry weight of the Massimo Warrior 1000 MXD Crew?
The dry weight of the Massimo Warrior 1000 MXD Crew is 1,988 lbs.
What engine does the Massimo Warrior 1000 MXD Crew have?

The Massimo Warrior 1000 MXD Crew features a V-twin, four-stroke engine.
What is the engine displacement in cubic centimeters for this model?
The Massimo Warrior 1000 MXD Crew has an engine of displacement 976cc.
How much horsepower does the 1000 MXD Crew produce?
The Massimo Warrior 1000 MXD Crew produces 81 horsepower.
How is the engine cooled in the Massimo Warrior 1000 MXD Crew?
Massimo Warrior 1000 MXD Crew’s engine is liquid-cooled.
What type of transmission is included in this UTV?
The Massimo Warrior 1000 MXD Crew features a Continuously Variable Transmission (CVT).
How does the selectable 4×4 drivetrain with a front differential lock work?
The selectable 4×4 drivetrain with front differential lock allows for higher traction with the aid of locking the front wheels collectively while wished.
What is the capacity of the winch option available for the 1000 MXD Crew?
The capacity of the winch option available for the Massimo 1000 MXD Crew is 3500 lbs.
Which fuel system powers the engine of this UTV?
Massimo Warrior 1000 MXD Crew features an EFI (Electronic Fuel Injection) system that powers the engine.
What certification does the ignition system have?
Massimo 1000 MXD Crew’s ignition system is EPA-licensed.
What type of front brakes does the Massimo Warrior 1000 MXD Crew feature?
Massimo Warrior 1000 MXD Crew comes with dual-piston calipers with drilled rotors and front brakes.
What type of rear brakes does this model include?
The rear brakes of the Massimo Warrior 1000 MXD Crew are single-piston calipers with drilled rotors.
How does the patented VI-LOCK dual A-arm suspension improve handling?
The patented VI-LOCK dual A-arm suspension improves handling by providing better stability and shock absorption.
How does the electrophoretic coating enhance the frame and body of this UTV?
The electrophoretic coating enhances durability and corrosion resistance for the frame and body.
What advantages do the adjustable shock absorbers provide?
Adjustable shock absorbers provide customizable suspension settings for varying terrain.
What is the purpose of the electronic dump bed in this vehicle?
The electronic dump bed enables easy loading and unloading of cargo.
How does the metal roof and half-door design improve the vehicle’s functionality?
The metal roof and half-door design add protection and practicality.
What kind of wheels does the Massimo Warrior 1000 MXD Crew have?
The UTV features durable cast aluminum wheels.
How does the 4-D series lighting improve visibility?
The 4-D series lighting improves visibility in low-light conditions.
What is the role of the rear mirror in enhancing safety?
The rear replicate enhances protection by supplying higher visibility of the surroundings.
What warranty coverage does the Massimo Warrior 1000 MXD Crew offer?
The Massimo Warrior 1000 MXD Crew comes with a 1-year constrained warranty.
How does the 1-year warranty benefit Massimo Warrior 1000 MXD Crew buyers?
Massimo Warrior 1000 MXD Crew’s 1-12 months warranty provides peace of mind and insurance for repairs.
How many service centers support the Massimo Warrior 1000 MXD Crew across the country?
There are over 130 service centers throughout the US available for Massimo Warrior 1000 MXD Crew.
Where can owners of the Massimo Warrior 1000 MXD Crew find service support?
Owners of Massimo Warrior 1000 MXD Crew can discover provider help at authorized Massimo provider centers.
What is the customer support number for assistance with the Massimo Warrior 1000 MXD Crew?
The customer support number for Massimo Warrior 1000 MXD Crew is 1-877-881-6376.
How can customers get in touch with support for the Massimo Warrior 1000 MXD Crew?
Customers can get in touch via phone or through the reputable Massimo website.
How does the Massimo Warrior 1000 MXD Crew accommodate up to six passengers comfortably?
The Massimo Warrior 1000 MXD Crew contains six passengers with no trouble with a spacious cabin.
What makes the cabin design of the Massimo Warrior 1000 MXD Crew ideal for large work crews?

Massimo Warrior 1000 MXD Crew’s cabin layout is good for big work crews, supplying ample space and ergonomic seating.
How does the locking differential beautify the overall performance of the Massimo Warrior 1000 MXD Crew?
Massimo Warrior 1000 MXD Crew’s locking differential enhances overall performance by presenting the most traction on hard terrain.
How does the locking differential enhance the performance of the Massimo Warrior 1000 MXD Crew?
The locking differential of the Massimo Warrior 1000 MXD Crew is useful in muddy, snowy, or uneven terrain conditions.
What benefits do rear-facing jump seats offer?
Rear-facing bounce seats offer additional seating ability and comfort.
How does the patented VI-LOCK Dual A-Arm suspension enhance handling?
The patented VI-LOCK Dual A-Arm suspension ensures improved handling and stability.
What advantages do fully adjustable Yearben Coilovers provide?
Fully adjustable Yearben Coilovers allow for precise suspension tuning based on load or terrain.
How does the full windshield improve safety and comfort?
The full windshield improves safety by protecting passengers from debris and weather while adding comfort.
What features are included in the digital UTV info center?
The digital UTV info center includes speed, fuel level, engine status, and maintenance alerts.
Why is EPA Certification important for the ignition system?
EPA Certification ensures compliance with environmental standards and improved ignition reliability.
How does a 7.9-gallon fuel tank benefit performance?
A 7.9-gallon fuel tank expands the driving range of the truck, thus making fewer trips to refuel and having a longer drive performance factor for both power as well as efficiency.
What are the advantages of cast aluminum wheels?
These light corrosion-resistant cast aluminum wheels offer fantastic performance, with excellent mileage in terms of fuel together with beautiful looking wheels for vehicles.
How does the metal half door improve functionality?
The metal half door adds to passenger safety and accessibility.
How does electrophoretic coating enhance durability?
The electrophoretic coating enhances the UTV’s durability by providing a rust-resistant finish.
What are the specs and features of the New 2024 Massimo Warrior 1000 MXD Crew?

Specs and Features Table:
Table: Specifications and Features of the 2024 Massimo Warrior 1000 MXD Crew
| Category | Specifications | Features |
| Engine | 1000 cc, 4-Stroke V-Twin, SOHC | Delivers powerful and reliable performance for rugged terrains. |
| Transmission | CVT L-H-N-R-P | Ensures smooth shifting and adaptability to varying terrain conditions. |
| Drive System | Selectable 2WD/4WD with locking differentials | Enhances traction and control on challenging trails. |
| Seating | Crew cab with seating for up to 6 passengers | Offers ample space for crew and cargo, making it ideal for work and recreation. |
| Suspension | PATENTED VI-LOCK DUAL A-ARM + FULLY ADJUSTABLE YEARBEN COILOVER | Provides a smooth ride and improved handling on uneven surfaces. |
| Cargo Bed | 12.6 cubic foot | Allows efficient transportation of heavy loads for work or outdoor adventures. |
| Towing Capacity | 1763 lbs. | Suitable for towing equipment, trailers, or other heavy-duty tasks. |
| Fuel Capacity | 7.9 gallons | Enables extended off-road excursions without frequent refueling. |
| Lighting | LED headlights and taillights | Ensures visibility and safety during nighttime use or in low-light conditions. |
| Tires/Wheels | FRONT: 29 X 9 X 14 REAR: 29 X 11 X 14 | Designed for durability and optimal performance on varied terrains. |
| Accessories | Standard roof, windshield, and winch | Provides added protection and utility for divers off-road activities. |
| Safety | Seat belts, rollover protection system (ROPS), and hydraulic disc brakes | Prioritizes user safety with comprehensive protection measures. |
| Technology | Digital display, GPS compatibility, and USB charging ports | Offers modern conveniences and aids navigation during long rides. |
The 2024 Massimo Warrior 1000 MXD Crew is a powerful and versatile UTV designed for both professional and recreational off-road use.
Equipped with a robust 1000cc V-twin engine and a selectable 2WD/4WD drive system.
The spacious crew cab accommodates up to six passengers.
With modern features like GPS compatibility and USB ports, as well as safety enhancements like ROPS and hydraulic disc brakes.
The Warrior 1000 MXD Crew ensures performance, comfort, and security for all your off-road adventures.
What is the top speed of the New 2024 Massimo Warrior 1000 MXD Crew?
The top speed of the 2024 Massimo Warrior 1000 MXD Crew is 43 mph.
What are the reviews of the New 2024 Massimo Warrior 1000 MXD Crew?

The customer reviews for the Massimo Warrior 1000 MXD Crew are mostly positive.
The overall summary of these reviews suggests this vehicle has solid build quality, solid build quality, impressive power, and suitability for work and off-road adventures.
BMS Motor Beast 4 Seater 1000cc 4WD/2WD Utility Terrain Vehicle UTV:
It is a powerful 4-seater with 4WD/2WD, a 996cc V-twin engine, and has versatile off-road capabilities.
What does the Massimo Warrior 1000 MXD powertrain offer?
The Massimo Warrior 1000 MXD powertrain offers :
- 85HP V-Twin EFI Engine
- CVT Transmission
- Selectable 4WD/2WD
How good is the 2023 Massimo Warrior 1000 MXD Crew?
The 2023 Massimo Warrior 1000 MXD Crew is a tough application car with an eighty-five HP V-twin engine, 4WD, and practical functions for work and play.
What is the top speed of the Warrior 1000 MXD?
The maximum speed of the Massimo Warrior 1000 MXD is 65 mph.
How well does the Massimo Warrior perform?
Performance feedback includes plenty of spark for most folks, very solid and sturdy rig, and great power and handling.
Other features like jump seats, CVT transmission, and a Rotex clone engine make it reliable.
What type of engine does the Massimo Warrior 1000 have?
Massimo Warrior 1000 has a 4-stroke, V-twin engine.
Which company manufactures the Massimo UTV?
The Massimo Motor Company, based in Texas, USA, designs and manufactures UTVs, focusing on application and leisure cars.
What are the different colors available for the Massimo Warrior 1000 MXD crew?
The Massimo Warrior 1000 MXD Crew is available in Black, Red, Blue, and Camo finishes to suit various preferences.
What is the average rating for a Massimo Warrior 1000 MXD crew?
The average rating for a Massimo Warrior 1000 MXD crew is 4.5 out of 5.
What is the price of a Massimo Warrior 1000 MXD crew?
The Massimo Warrior 1000 MXD Crew costs $21,999 (MSRP).
What are some other popular models related to the Massimo Warrior 1000 MXD crew?
Other popular models related to the Massimo Warrior 1000 MXD Crew include:
- Massimo Warrior 800 – Compact and efficient, ideal for lighter utility work.

- Massimo Buck 450 – A mid-range option for work and recreation.

- Massimo T-Boss 750 – Well-suited for off-road adventures with a balanced power-to-weight ratio.

- Massimo GKA200 – Focused on versatile utility with a smaller engine.

- BMS Motor Beast 1000cc 4-Seater – Designed for family and group off-road activities.

- ODES Desert Cross 1000-6 HVAC EFI – A competitive alternative for rugged terrain, offering comfort and performance.

Massimo Warrior 1000 Mxd Crew, 4-stroke V-twin UTV
Massimo Warrior 1000 MXD Crew features a 4-stroke V-twin, 85 HP EFI engine with 4WD capability.
Ranch Armor Polaris Ranger 1500 Crew Cab Metal Top
Ranch Armor Polaris Ranger 1500 Crew Cab Metal Top offers a durable metal top and a powerful drivetrain for rugged tasks.
Massimo Warrior 1000 MXD UTV, 4-stroke, V-twin, Automatic
Massimo Warrior 1000 MXD Crew is Equipped with a CVT transmission, providing smooth off-road performance
Sides Desert Cross 1000-6 HVAC EFI 4X4 Offroad UTV Side By Side
Includes HVAC and EFI technology, ensuring comfort in extreme conditions.
What are popular models in the Massimo Warrior Series – Side By Side and UTV?
Popular Models in the Massimo Warrior Series: Warrior 800MXU, Warrior 1000 MXD Crew, Warrior T-Boss 750.
The Massimo Warrior 1000 MXD Crew is really an amazing UTV for Off-road lovers because of its superior performance, comfort, and durability.
The Massimo Warrior 1000 MXD Crew features a strong 1000 cc engine with 85 horsepower.
The Massimo Warrior 1000 MXD Crew has 13.78 inches of ground clearance, 1763 lbs of towing capacity, and 7.9 gallons of fuel capacity.
Massimo Warrior 1000 MXD Crew’s full metal jacket construction adds durability, while the high-capacity 12.6 cubic foot cargo bed, hood, and roof racks, and a 1763 lb towing capacity make it highly practical.
The cost of Massimo Warrior 1000 MXD Crew is $21,999.
As per Massimo Warrior 1000 MXD Crew’s performance and specifications, it’s really affordable.
The Warrior 1000 MXD Crew is a total standout! Compare its features with the solo-focused Massimo Warrior 1000 MXD, the rugged Massimo Warrior MXU 1000, or the powerful Massimo Warrior 800.
Subscribe for Our Latest Posts! Thank you!